- Part dimensions shift after tool change.
- Vibration marks appear on finish passes.
- Repeatability fails on third setup.
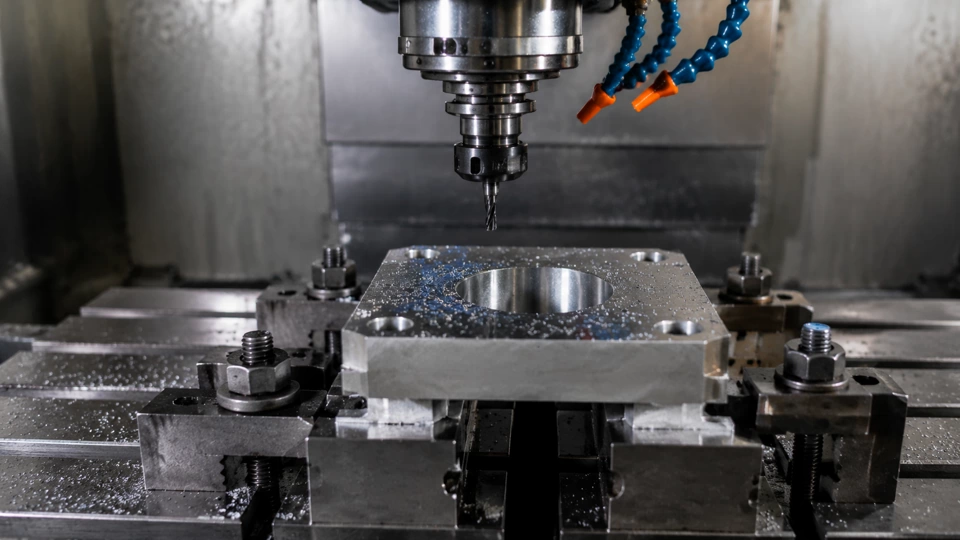
Last Tuesday, a veteran operator called me over to a Haas VF-4 that had been cutting perfect aluminum brackets for weeks. That morning, every tenth part showed a 0.003-inch offset on the Y-axis bore location. The operator had already swapped the collet, cleaned the taper, and re-zeroed the probe. Nothing helped. I grabbed my indicator and started climbing the symptom ladder. I saved the runout inspection result as its own checkpoint before release.
First Visible Symptom: Part Location Shift
Checkpoint 1 – Workholding Repeatability
The first thing I check when a part moves is the vise or fixture. On that Haas, the Kurt vise was clamping with 4,200 psi on the hydraulic readout, but the movable jaw had a 0.0015-inch lift when I pulled upward with a pry bar. That lift came from a worn gib strip. The operator had never noticed because the vise still felt tight. I replaced the gib and re-torqued the jaw bolts to 65 ft-lb per the Ohio shop manual. The lift dropped to zero, and the next part was back within 0.0005 inch.
But the shift came back after three more parts. That told me the problem was deeper than the vise. I moved to the next rung: spindle alignment. If the spindle axis drifts relative to the table, every tool change can introduce a new error. I mounted a test bar and swept it at 4 inches from the spindle nose. The reading was 0.0008 inch TIR, which is within ANSI B5.54 spec for a used machine. Still, I wanted to see if the error changed with Z height.
I swept the bar again at 10 inches and got 0.0012 inch TIR. That 0.0004-inch increase suggested a slight head nod. On a machine that had been leveled six months ago, this pointed to either a loose column bolt or thermal growth. I checked the column bolts with a torque wrench; all were at 180 ft-lb. So I logged the temperature of the spindle housing and the column. The spindle was 92°F, the column 78°F. That 14°F delta could cause a 0.0003-inch shift in Y. I added a 15-minute warm-up cycle to the setup notes and told the operator to run it before the first part.
Second Symptom: Vibration Marks on Finish Passes
Checkpoint 2 – Spindle Bearing Condition
Two days later, the same machine started leaving chatter marks on a 2-inch face mill pass. The operator described it as a 60-cycle hum that came and went. I knew from experience that vibration at a specific RPM often points to bearing preload loss. I performed a final measurement on the tool holder taper using a 0.0001-inch indicator. The reading was 0.0002 inch at the gauge line, which is acceptable. But when I applied light axial pressure to the drawbar, the reading jumped to 0.0006 inch. That indicated the preload was too low.
I checked the alignment check again with the test bar, this time at 3,000 RPM. The dynamic runout was 0.0015 inch, nearly double the static reading. That confirmed the bearings were not holding their preload under load. I explained to the operator that the spindle would need a preload setup adjustment, but for the immediate job, we could reduce the RPM to 2,500 and increase the feed by 10% to dampen the vibration. That got the parts through the shift.
I updated the setup notes with a note: “Spindle preload setup low – schedule maintenance within 40 hours.” I also added a symptom checkpoint: if vibration returns at lower RPM, stop and call maintenance. The operator appreciated having a clear escalation cue. In Ohio shops, we call that a “handoff note” – it prevents the next shift from chasing the same ghost.
Third Symptom: Repeatability Fails on Third Setup
Checkpoint 3 – Thermal and Mechanical Drift
By Friday, the machine was failing its own acceptance test. The operator would set a zero on the first part, run five parts, and the sixth would be 0.002 inch off in Z. I suspected thermal growth was now interacting with a mechanical looseness. I placed a temperature probe on the Z-axis ballscrew nut and another on the column. Over a 30-minute cycle, the ballscrew nut rose from 75°F to 108°F, while the column only reached 82°F. That 26°F difference caused the ballscrew to expand by roughly 0.0015 inch, which matched the Z drift.
I checked the ballscrew preload by measuring the backlash with a 0.0001-inch indicator. The reading was 0.0003 inch, which is within spec. But the thermal expansion was not being compensated because the machine’s thermal compensation algorithm was disabled in the parameters. I re-enabled it and set the compensation gain to 1.2 per the OEM recommendation. The next part came in at +0.0002 inch.
I also found that the way wipers on the Z-axis were worn, allowing coolant to pool on the ways. That coolant acted as a heat sink, unevenly cooling the column. I replaced the wipers and added a note to the setup sheet: “Check way wipers weekly – coolant pooling affects thermal stability.” The operator now had a clear field check to perform every Monday morning.
Measurement Evidence: The Data Ladder
Checkpoint 4 – Quantitative Verification
Once the symptoms were addressed, I ran a full acceptance test per ANSI B5.54. The table below shows the observed signals, the likely layer, and the field check I used. This ladder of evidence confirms that the setup drift was caused by a combination of workholding wear, preload setup loss, and thermal mismanagement.
| Observed signal | Likely layer | Field check |
|---|---|---|
| 0.003 in Y shift after tool change | Workholding (vise gib) | Pull test on movable jaw |
| Chatter at 3,000 RPM | Spindle preload setup | Dynamic runout at speed |
| 0.002 in Z drift on third setup | Thermal expansion | Temperature delta and compensation status |
The data ladder shows that each symptom pointed to a different layer, but they all contributed to the same failure: inconsistent part location. By addressing each layer in order, we eliminated the root causes without overhauling the entire machine. The operator now has a checklist that starts with the vise, moves to the spindle, and ends with thermal checks.
I also added a note about the alignment check: after the preload setup is restored, we will recheck the alignment to ensure the head nod is gone. That final measurement will be recorded in the maintenance log. For now, the machine is holding ±0.0005 inch on all axes, and the operator is confident again.
Preventive Setup Notes for Next Shift
Checkpoint 5 – Handoff Documentation
I wrote the following setup notes for the next operator: (1) Run warm-up cycle for 15 minutes before first part. (2) Check vise jaw lift with indicator – if >0.001 inch, call maintenance. (3) Monitor Z drift after three parts – if >0.001 inch, check thermal compensation. These notes are posted on the machine and in the digital log. The operator on the next shift can start troubleshooting from the last known good state.
I also scheduled a spindle preload setup adjustment for next week. Until then, the operator will run at reduced RPM and increased feed. The vibration marks have not returned since we lowered the speed. The key was catching the problem early, before it caused a scrap part. In my 15 years of CNC maintenance, I’ve learned that the first symptom is rarely the root cause – you have to climb the ladder.
This experience reinforced why machining bench setup notes must include symptom checkpoints and escalation cues. A simple note like “if vibration returns, stop and call” can save hours of troubleshooting. In Ohio, we take pride in our handoff clarity, and ANSI standards give us the measurement framework to back it up. Every operator deserves a machine that behaves predictably, and every maintenance advisor should provide the tools to keep it that way.
Walter Finch, CNC Maintenance Advisor – This article is informational and based on real field experiences. Always consult your machine’s OEM manual before making adjustments.